
— —
How to Troubleshoot Thread Roller Marks, Slippage, and Poor Surface Finish
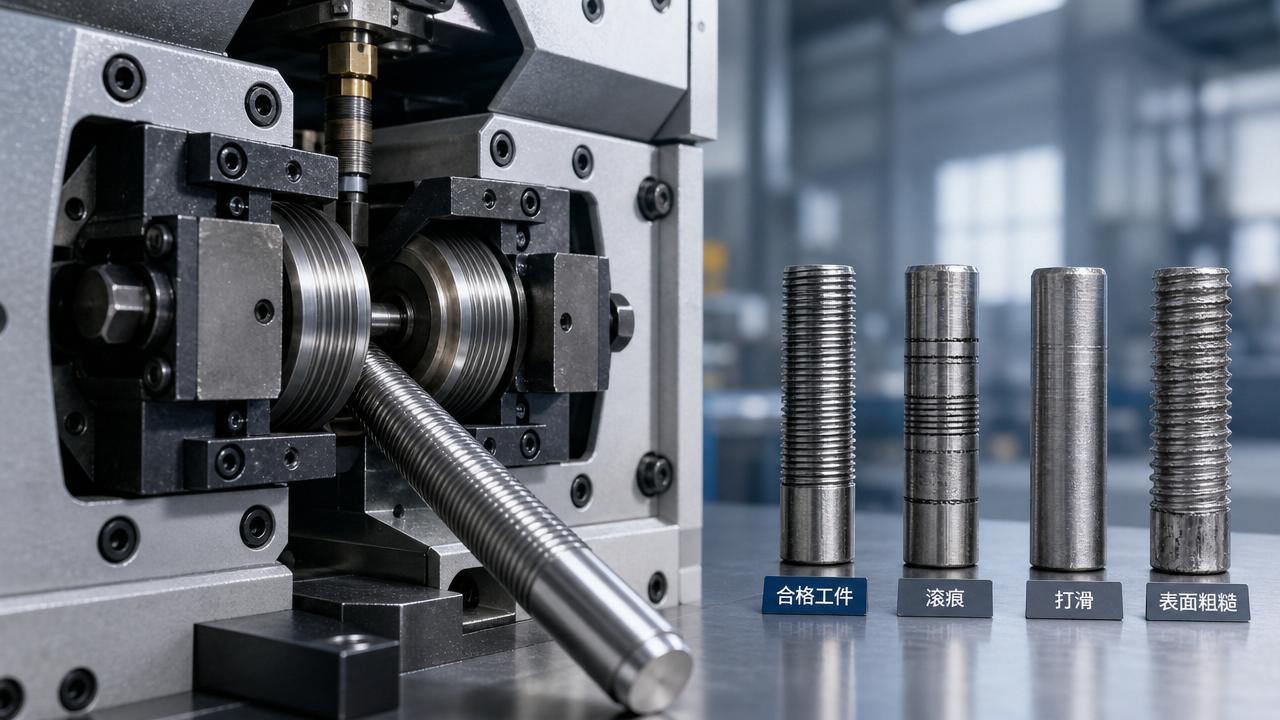
When thread rolling defects interrupt normal production
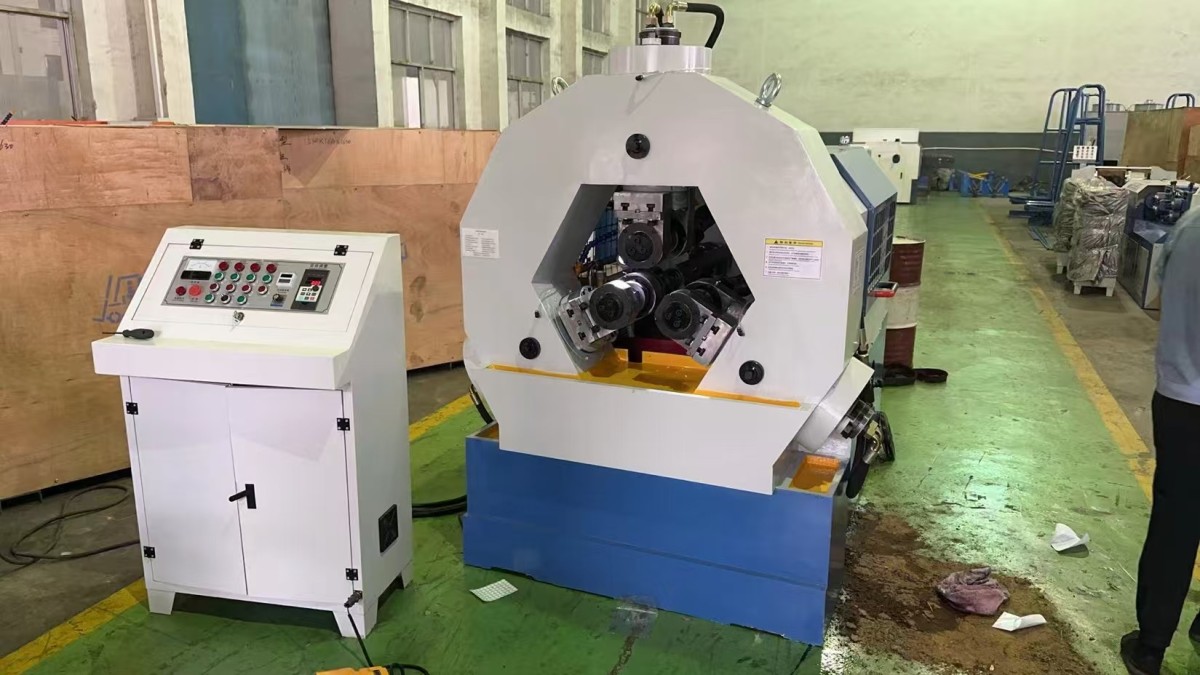
When a Thread roller leaves marks, slips, or dulls the surface, output quality usually drops before the fault becomes obvious.
In metalworking lines, that often means rework, unstable pitch, rejected parts, and unnecessary downtime across connected machines.
A practical diagnosis starts with one question: did the problem appear after tooling change, material change, speed adjustment, or longer continuous running?
That distinction matters because the same surface defect on a Thread roller can come from very different causes.
Wuxi Armada International Trade Co., Ltd has worked with thread rolling machines and other fabrication equipment under ISO9001 and CE-oriented standards.
In actual service conditions, export projects and mixed production environments make fault judgment even more dependent on site details.
The first check changes with the production situation
A Thread roller used on low-volume repair jobs behaves differently from one running long batches every shift.
Short runs often expose setup errors quickly. Long runs more often reveal heat buildup, lubrication breakdown, and progressive die wear.
Material type also changes the diagnosis path. Carbon steel, stainless steel, and harder alloys do not deform the same way during rolling.
If the material hardness drifts outside the expected range, slippage can appear even when the Thread roller itself looks acceptable.
A useful shop-floor habit is to compare defective parts with the last confirmed good sample, not only with the drawing.
Different clues point to different root causes
This kind of quick sorting prevents wasted time on random adjustments that make later diagnosis harder.
If marks appear suddenly, look at tooling and setup together
Sudden marks usually tempt operators to replace dies immediately, but that is not always the real fix.
Check whether the Thread roller dies were mounted with correct parallelism and whether the workpiece enters squarely.
Even a small offset can print a repeating pattern that resembles wear.
Another common source is trapped scale, chips, or dried lubricant on the die face.
In forging-related blanks or poorly cleaned cut stock, contamination transfers quickly and leaves visible roller marks.
If the marks deepen after several parts, inspect the die edge under magnification instead of relying on visual checks alone.
Where similar fabrication lines offer a useful comparison
In many factories, thread rolling sits beside welding, cutting, or plate processing equipment with similar maintenance discipline.
For example, a line using Welding manipulator systems for tank, pipe, or vessel fabrication often values repeatability over isolated machine speed.
That mindset helps with a Thread roller too: stable positioning, controlled motion, and verified support matter more than aggressive output settings.
The same principle behind controlled boom travel, remote operation, and coordinated movement in automated welding also applies to rolling consistency.
When slippage shows up, the real issue is often before the dies touch
Slippage often gets blamed on worn dies, but blank preparation causes many unstable threads.
If the starting diameter is undersized, the Thread roller may fail to grip and displace material correctly.
If the diameter is oversized, pressure rises too fast and the surface may smear before the thread form stabilizes.
Chamfer quality matters too. A poor lead-in angle makes the workpiece fight the entry path.
In higher-speed production, feed timing and support rigidity become more critical than many teams expect.
- Measure blank diameter from several batches, not just one sample.
- Confirm entry chamfer geometry against the die design.
- Check whether hydraulic or mechanical pressure remains stable during the rolling stroke.
- Review support and guide wear if slippage appears only on longer parts.
When slippage occurs intermittently, material consistency is often the better suspect than machine structure.
Poor surface finish usually reflects heat, lubrication, or material behavior
A rough finish on a Thread roller process is rarely just a cosmetic issue.
It often signals friction levels that will shorten die life and reduce dimensional stability.
In actual applications, stainless steel and tougher alloys need more careful oil selection and speed control.
If the lubricant film collapses, the thread may look burned, dragged, or torn along the flanks.
Temperature rise is another clue. A machine that runs well cold but worsens after one hour is pointing toward lubrication or bearing condition.
This is more common in continuous export-oriented production where cycle stability matters across long shifts.
Surface finish decisions should match the material and output target
The best fix is usually the one that holds quality for the next full batch, not just the next five parts.
What gets misjudged most often on site
One frequent mistake is treating similar materials as identical because the drawing stayed the same.
A small change in hardness, coating, or surface scale can change how the Thread roller behaves.
Another mistake is checking only machine settings while ignoring the upstream cutting or handling condition.
Bent blanks, inconsistent chamfers, and rough stock ends often create defects that look like rolling faults.
There is also a cost-related misjudgment: focusing only on die replacement price without tracking downtime, scrap, and adjustment labor.
In many workshops, a slightly better lubrication routine saves more than frequent emergency die changes.
Useful checks before changing major components
- Record defect timing: first part, warm-up stage, or end of batch.
- Compare good and bad parts under the same light and magnification.
- Confirm lubrication delivery at the actual contact point.
- Inspect supporting guides, spindle condition, and abnormal vibration.
- Review upstream blank preparation and material certification.
A more reliable way to restore thread rolling quality
The fastest recovery method is not random fine-tuning. It is controlled elimination.
Start with the defect shape, then connect it to material condition, tooling state, machine alignment, and lubrication behavior.
That sequence reduces guesswork and helps the Thread roller return to stable output with fewer repeated stoppages.
For factories running multiple fabrication systems, standardized inspection logic across rolling, cutting, and welding equipment usually improves response speed.
Where automated welding cells use models such as LHQ1010 to LHQ7070 with controlled lifting, telescopic motion, and reliable safety design, the lesson is familiar.
Stable process results come from matching equipment capability to the real working condition, not from chasing one parameter alone.
The next practical step is to sort defects by appearance, verify blank and die condition, and build a short fault checklist for each material type and batch pattern.